

Today, Creative Team Member, Miki, is sharing her process to Create a Clipping Mask with Brushes in Adobe Photoshop.
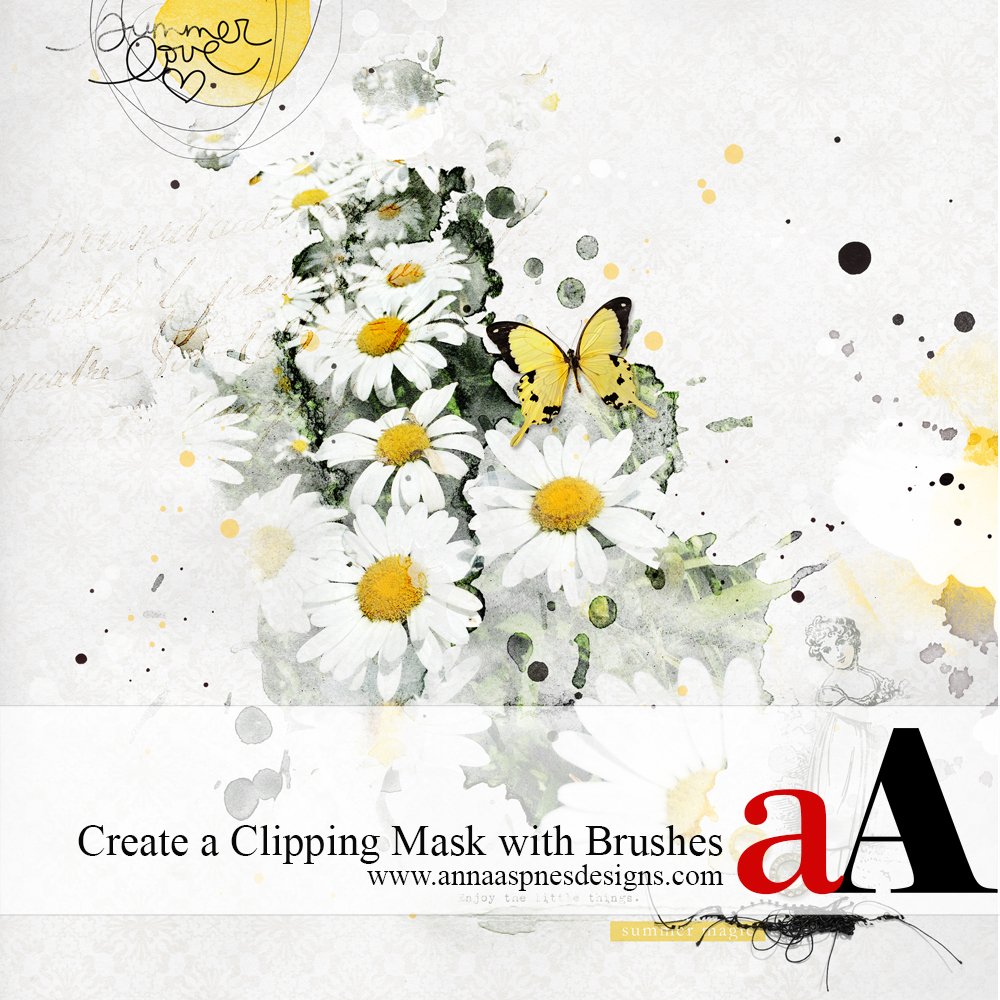
Create a Clipping Mask with Brushes

1. Create a Foundation
Build the background for your artsy layout design.
- Create a new 12 x 12 page at 300 dpi.
- Open and drag your paper onto the layout using the Move Tool from the Tools Panel to create your layout foundation.
- Pattern paper #1 from ArtPlay Palette Vintage Summer was used for this page.

2. Make Clipping Mask
Use a variety of brushes to create a custom clipping mask.
- Stamp ArtsyStains on New Layers over the photo using the Paint Brush Tool from the Tools Panel.
- ArtsyStains No. 8 was used on this page.
- Move, rotate and resize the brush imprints as preferred using the Transform Tool.

- Press CMD/CTRL + E to merge the stain layers together when you are satisfied with the coverage.
- Clip your photo to the merged stains and then merge the two layers together.
- For a more prominent image, press CMD/CTRL + J to duplicate the layer.
- Repeat and apply different Blending Modes as preferred.

Learn more about Brushes in the aAdvanced Brushes workshop for Photoshop and Elements.

3. Embellish
Add Brushes, WordArt and Embellishments.
- Finish the page by adding WordArt, Textures, Stitching, Artsy Transfers and Brushes from the aA store.
- Have fun and enjoy the adventure of creating!

Post your digital artistry and artsy digital scrapbooking pages in The Gallery, and if you liked this Create a Clipping Mask with Brushes Tutorial, please consider sharing it using the social media buttons below.


Recent Comments